To create a user on DiliTrust, you must have a role that grants you the proper permissions to create or modify users.
To learn more about roles on DiliTrust, see the dedicated article.
In this article, learn how to:
Create a user
To add a user on DiliTrust:
- From the homepage, click on Settings
- Open the Users tab
- Click on Add a user (top right corner of your screen)
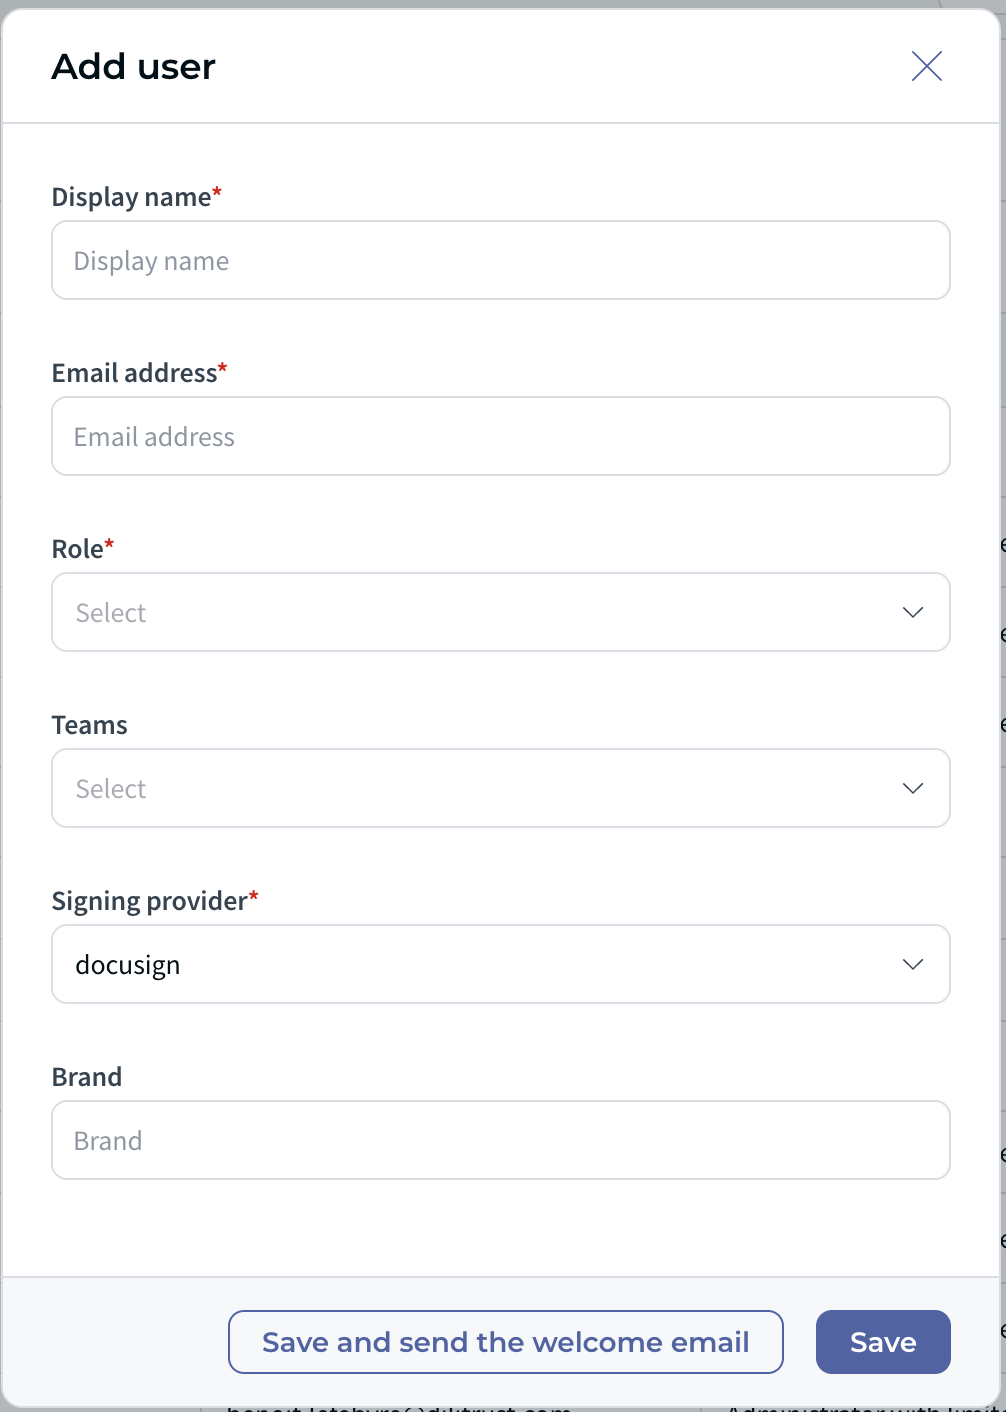
- A window will open — fill in the following fields:
| Field | Required | Description |
|---|---|---|
| Display name | Yes | The name that will be displayed to other users on the platform. |
| Email address | Yes | The user's professional email address, used to log in and receive notifications. |
| Role | Yes | Determines the user's access rights within the platform. A role must be assigned at creation. Learn more about roles. |
| Teams | No | Assign the user to one or more teams. Teams are used to manage access rights on folders and documents. Learn more about teams. |
| Signing provider | Yes | Select the electronic signature provider to associate with the user (e.g. DocuSign, Yousign). Signing providers are configured at the tenant level — up to 2 providers can be enabled on your instance. Learn how to configure a signing provider on DiliTrust CLM. |
| Signing entity | No | Associate a signing entity with this user to customize the signing experience: logo, colors, and email design displayed to signatories. Particularly useful when multiple brands or departments coexist within the same instance. Learn more about signing entity configuration. |
- Once the form is complete, choose one of the following options:
- Save and send the welcome email — creates the user and immediately sends them an email with a link to access the platform and set their password
- Save — creates the user without sending the notification (you can send it at any time afterwards)
To send the welcome email later: from the user list, click the Send button on the right side of the user's row. You can also select multiple users at once and send emails in bulk.
Click Send again at any time to re-send the welcome email to an existing user.
Organize your users
Once created, users appear in the Users list. You can:
- Search for a user using the search bar (top left of the page)
- Sort the list by name, email, role, team, or last connection by clicking the arrow icon on the relevant column header

Modify a user
To update the information of an existing user:
- Double-click on the user you wish to modify
- A window will open — you can update: display name, email address, role, teams, signing provider, and brand
- Click Modify to save your changes
Export your user list
To facilitate user management and auditing:
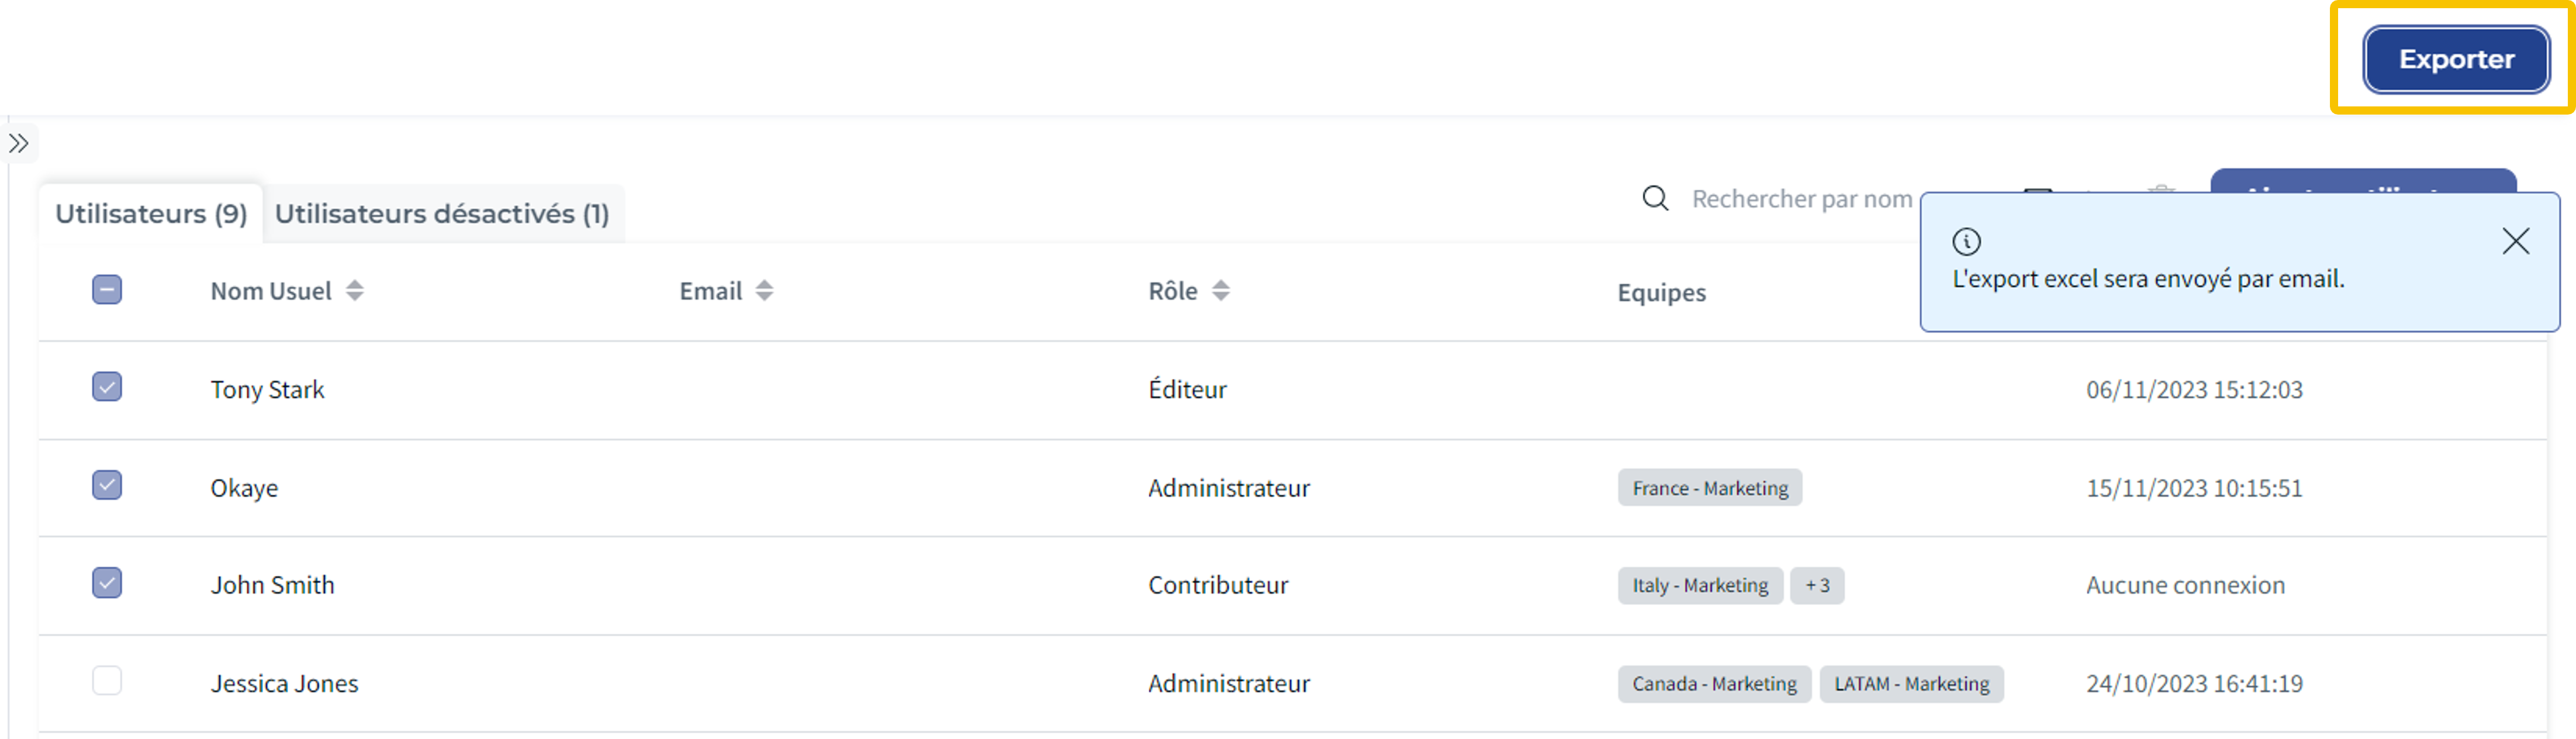
- From the Users page, click the download icon (top right corner)
- The export is launched — you will be notified by email when the Excel file is ready to download
Transfer permission rights
DiliTrust allows you to transfer a user's permission rights to another user to handle absences, departures, or role changes.
To learn more, see the dedicated article.
Was this article helpful?
That’s Great!
Thank you for your feedback
Sorry! We couldn't be helpful
Thank you for your feedback
Feedback sent
We appreciate your effort and will try to fix the article