With Microsoft Copilot Studio, you can build your own AI agent and connect it to DiliTrust. Once it is set up, the agent can do two things for your users:
- Explain how to do things in DiliTrust, by using the DiliTrust Help Center as a knowledge source.
- Act in DiliTrust for them, by using the tools available in the DiliTrust MCP server.
MCP (Model Context Protocol) is an open standard that lets AI agents connect securely to external applications and use their features. This article walks you through the whole setup: creating the agent, connecting it to the DiliTrust MCP server, and adding the DiliTrust Help Center as knowledge.
✋ Before you start
Make sure you have:
Access to Microsoft Copilot Studio with the right to create agents.
- A DiliTrust user account. Each person using the agent signs in with their own DiliTrust account.
- The DiliTrust MCP connection details below. Keep this page open, you will copy them into Copilot Studio.
DiliTrust MCP connection details
- Server URL: https://mcp.dilitrust.com
- Client ID: - (got from DiliTrust once subscribed)
- Client secret: - (got from DiliTrust one subscribed)
- Authorization URL: https://auth.dilitrust.com/oauth2/authorize
- Token URL: https://auth.dilitrust.com/oauth2/token
- Refresh URL: https://auth.dilitrust.com/oauth2/token
- Scopes: mcp.access
Step 1️⃣: Create your agent
- Sign in to Copilot Studio. You land on the Home page.
- Describe in a few words what you want your agent to do, for example: "Help DiliTrust users find how to do things in DiliTrust and carry out actions in DiliTrust for them."
- Copilot Studio creates the agent and opens its Overview page. Review and adjust the agent's name, description, and instructions.
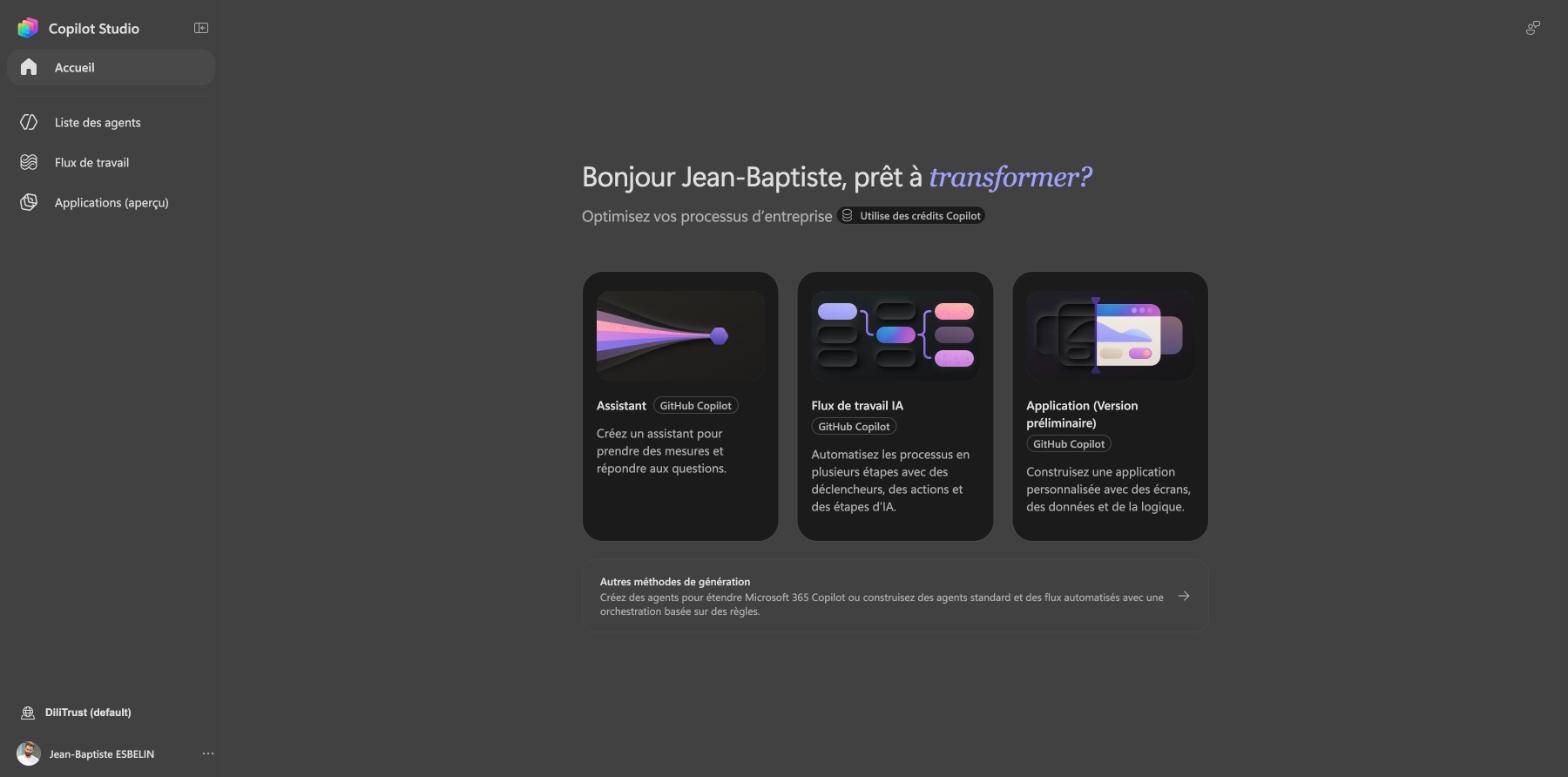
In the instructions, tell the agent clearly when to use each source. For example:
- "When the user asks how to do something in DiliTrust, answer using the DiliTrust Help Center and give the link to the relevant article."
- "When the user asks you to do something in DiliTrust, use the DiliTrust tools to do it, then confirm what was done."
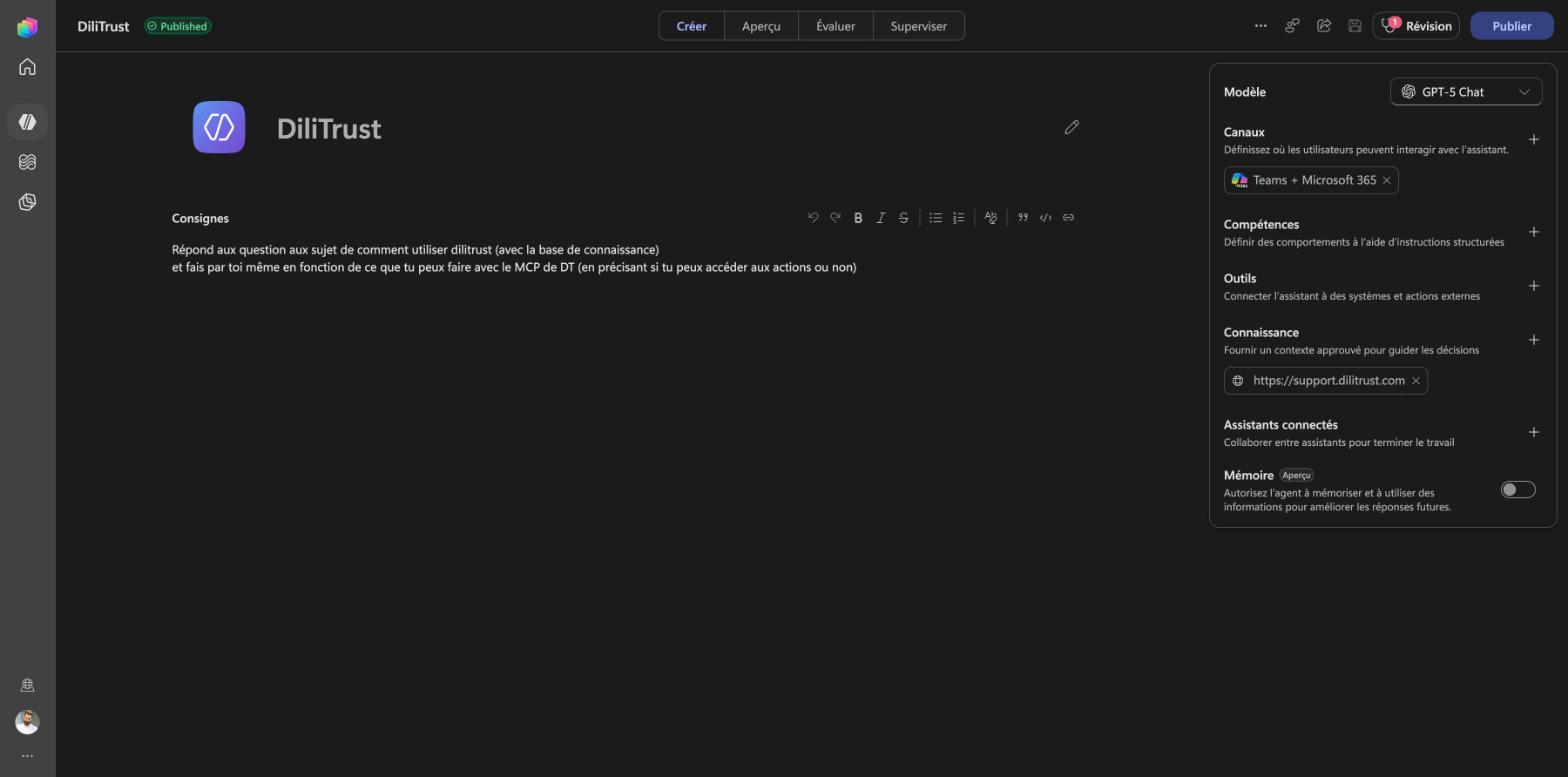
Copilot Studio may suggest knowledge sources and tools when it creates the agent. You can ignore them and follow the next steps instead.
Step 2️⃣: Connect the DiliTrust MCP server
- In your agent, go to the Tools page.
- Select Add a tool, then New tool.
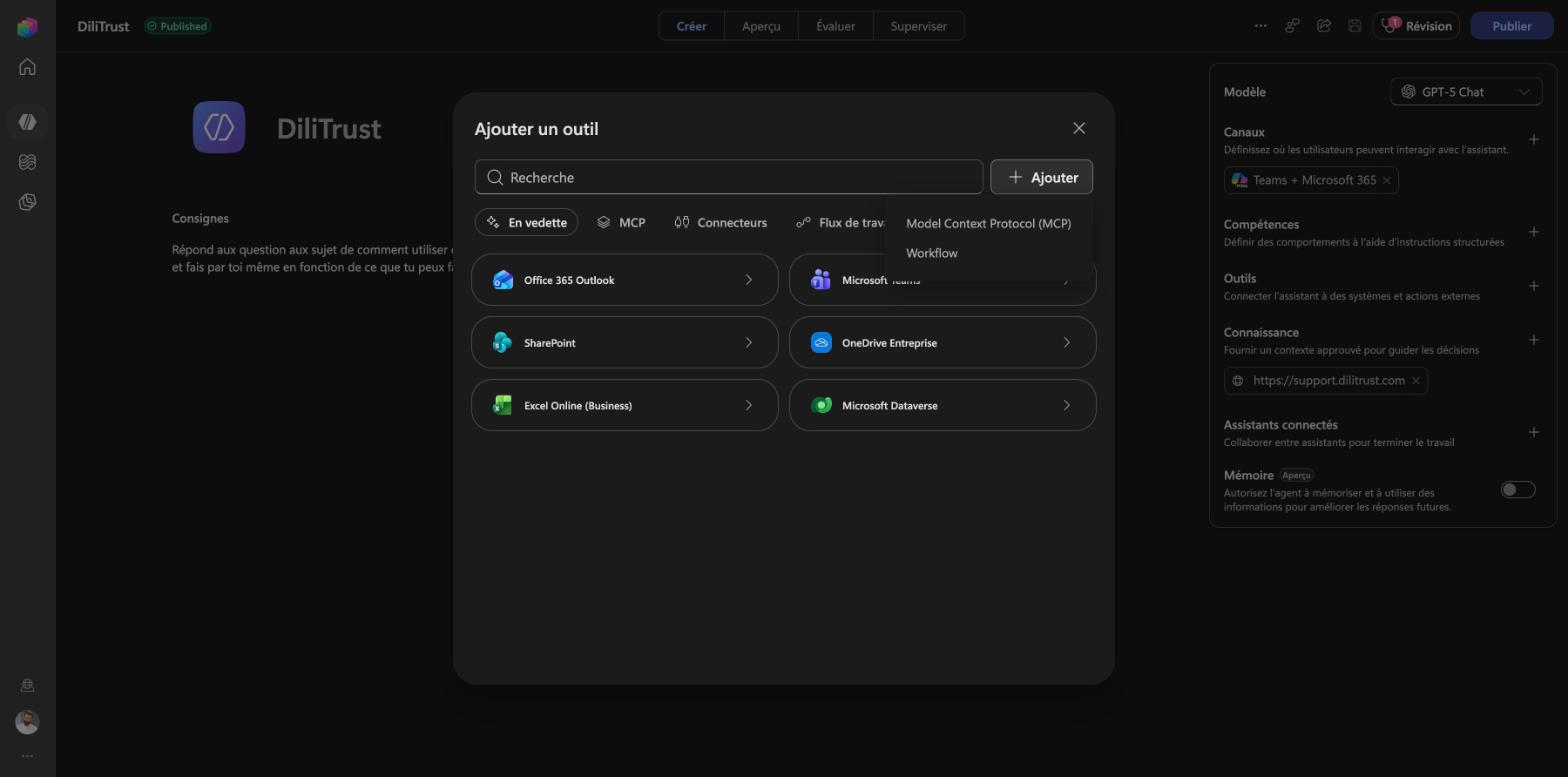
- Select Model Context Protocol. The MCP setup wizard opens.
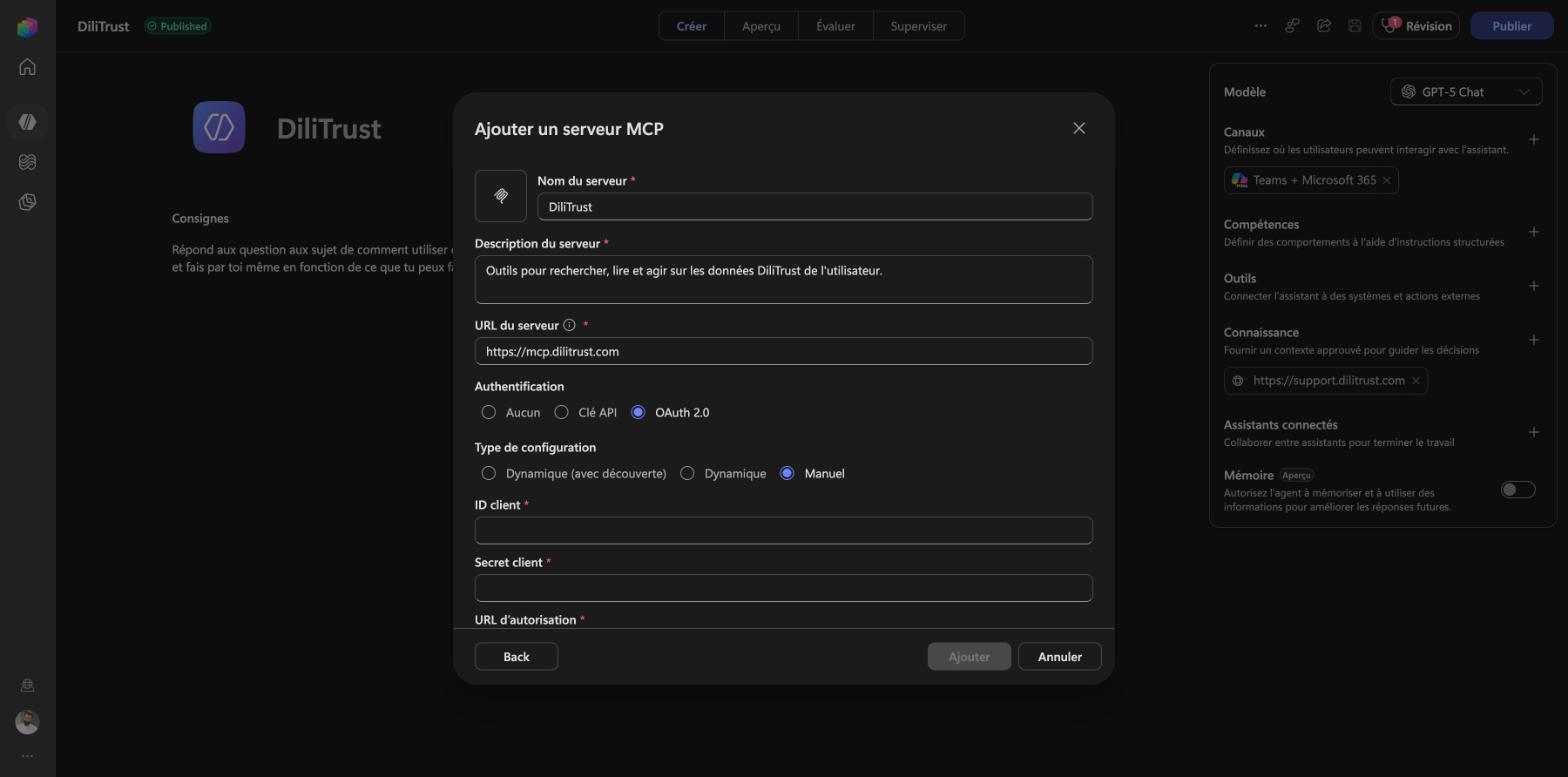
- Fill in the server details:
- Server name: DiliTrust
- Server description: a short, clear description, for example "Tools to search, read, and act on the user's DiliTrust data." The agent uses this description to decide when to call DiliTrust, so keep it explicit.
- Server URL: https://mcp.dilitrust.com
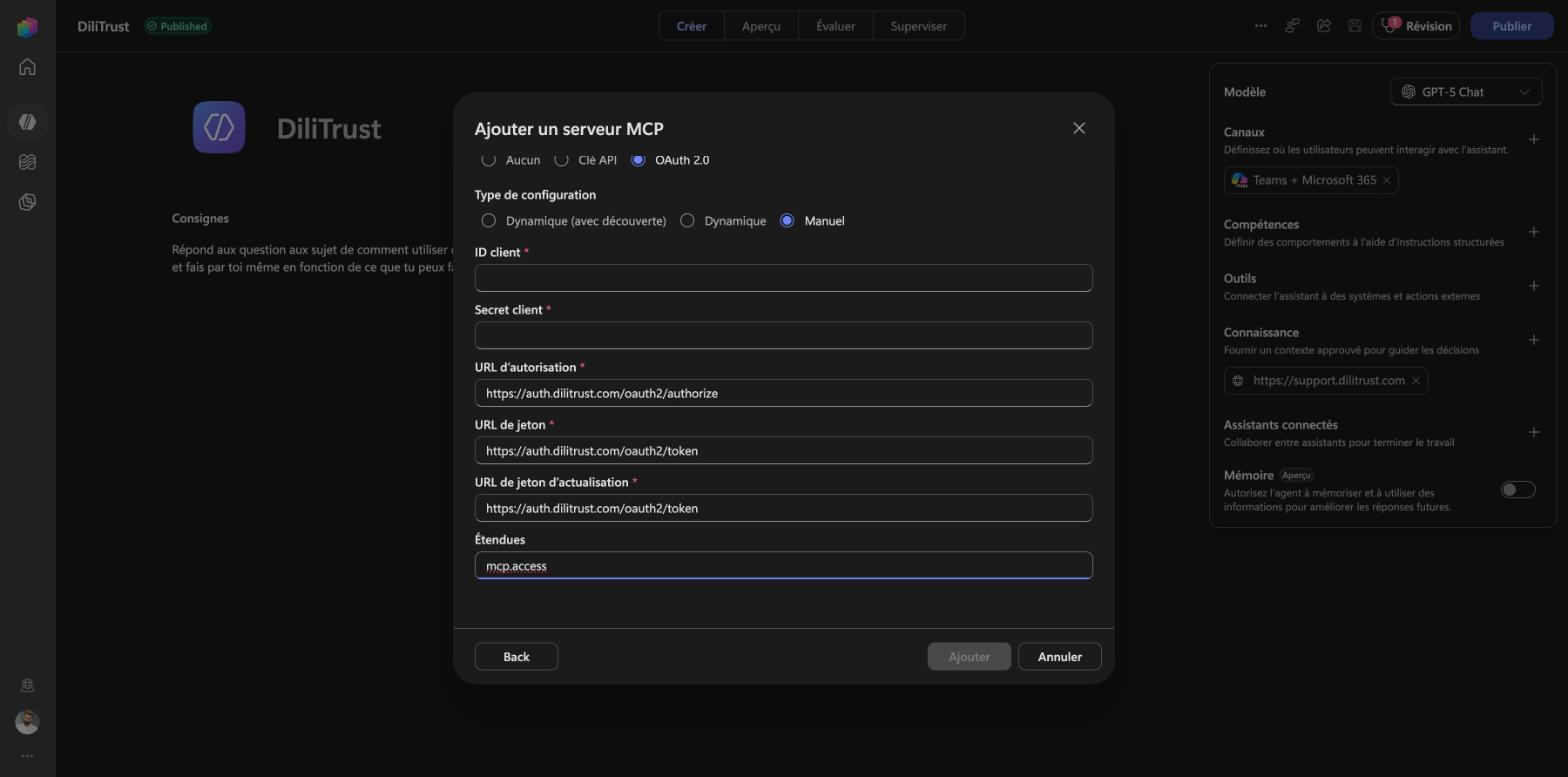
- For the authentication type, select OAuth 2.0, then select Manual.
- Fill in the OAuth fields with the DiliTrust connection details listed above:
- Client ID: O6R7LdpJrFxCrVbW6eaChcWphBLjlMSr
- Client secret: uWzM1bkk2bMMc4hzVY1SY1DxGQmRU71C
- Authorization URL: https://auth.dilitrust.com/oauth2/authorize
- Token URL template: https://auth.dilitrust.com/oauth2/token
- Refresh URL: https://auth.dilitrust.com/oauth2/token
- Scopes: mcp.access
- Select Create, then Next.
- In the Add tool window, select Create a new connection and sign in with your DiliTrust account when prompted.
- Select Add to agent.
The DiliTrust tools are now available to your agent.
Step 3️⃣: Add the DiliTrust Help Center as knowledge
This step lets your agent explain how DiliTrust works, using the official Help Center articles.
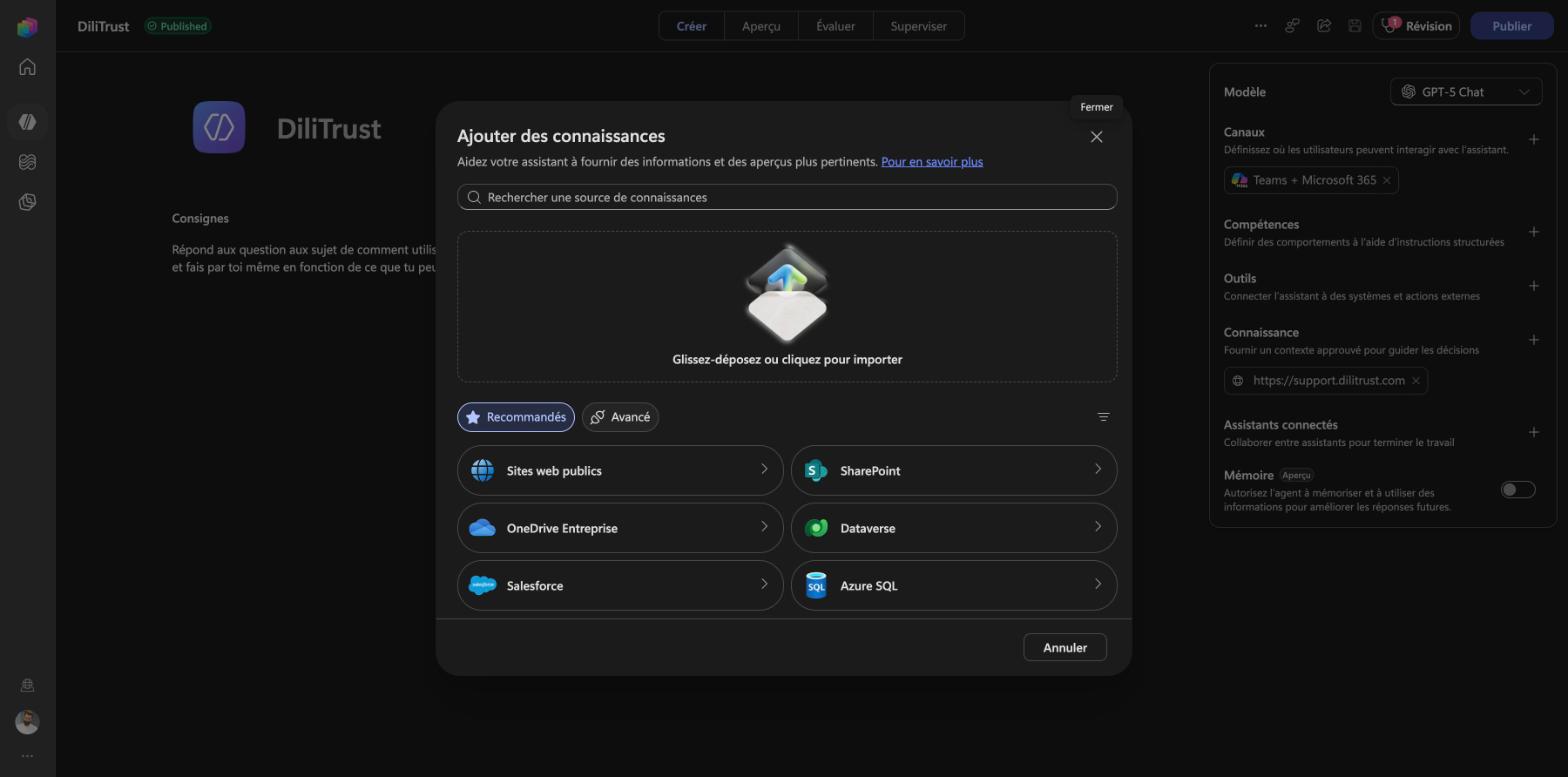
- In your agent, select Add knowledge (from the Overview or Knowledge page).
- Select Public websites.
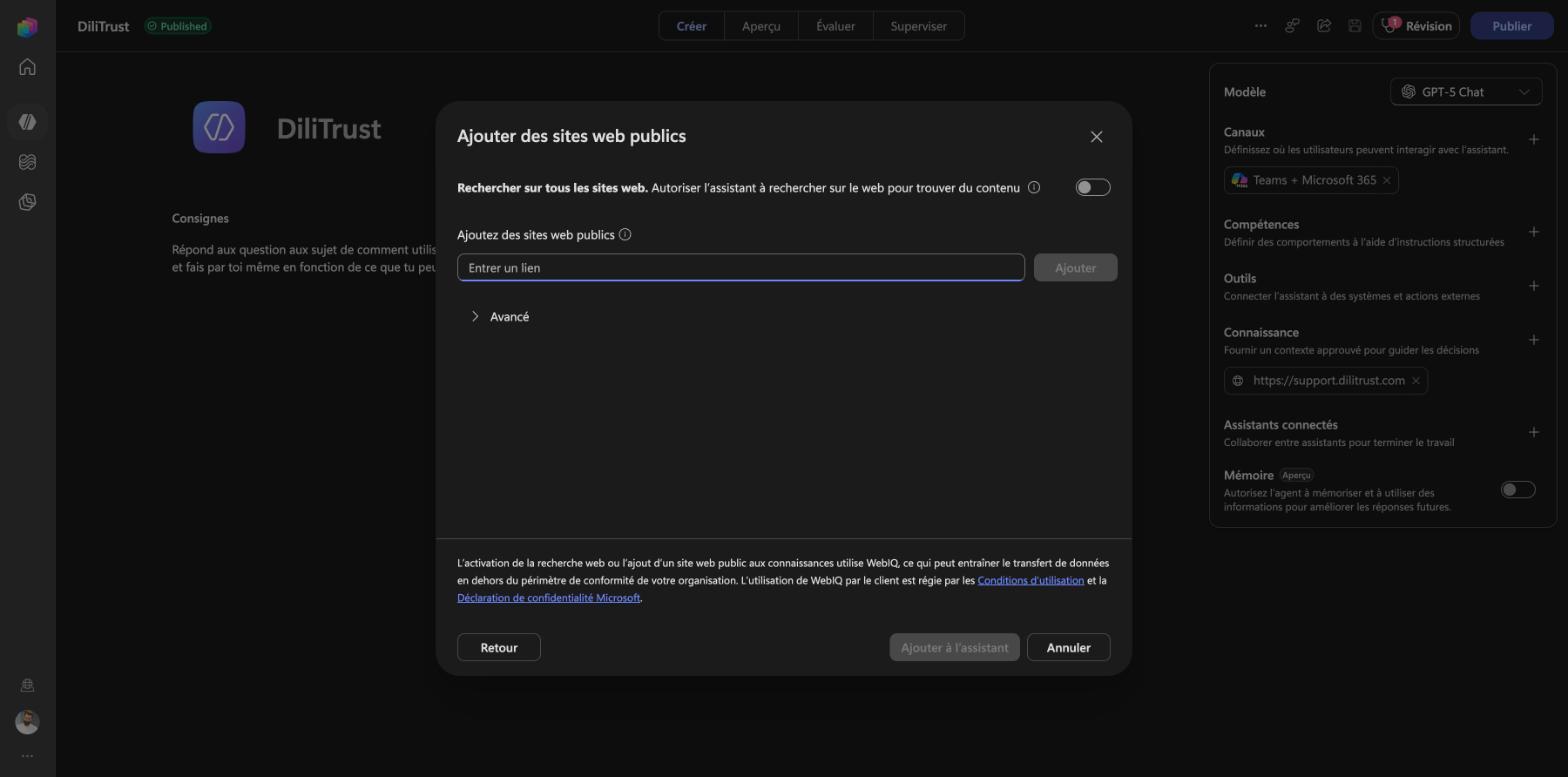
- In the Public website link field, enter https://support.dilitrust.com and select Add.
- Optionally, edit the Name (for example "DiliTrust Help Center") and the Description (for example "Official DiliTrust user guides and FAQs").
- Select Add to agent.
Step 4️⃣: Test your agent
- Open the test chat in Copilot Studio.
- Ask a "how to" question, for example "How do I connect to DiliTrust?". The agent should answer from the Help Center.
- Ask the agent to do something in DiliTrust. The first time, a sign-in card appears in the chat: sign in with your DiliTrust account and accept the requested access.
- Check that the agent uses the DiliTrust tools and confirms what it did.
Once the agent works as expected in the test chat, publish it and make it available to your users in Microsoft 365 Copilot and Teams (Steps 5 and 6).
Step 5️⃣: Publish your agent to Microsoft 365 Copilot and Teams
Publishing in Copilot Studio is not enough for users to see the agent: you also need to add the Teams + Microsoft 365 channel, then install the agent (Step 6).
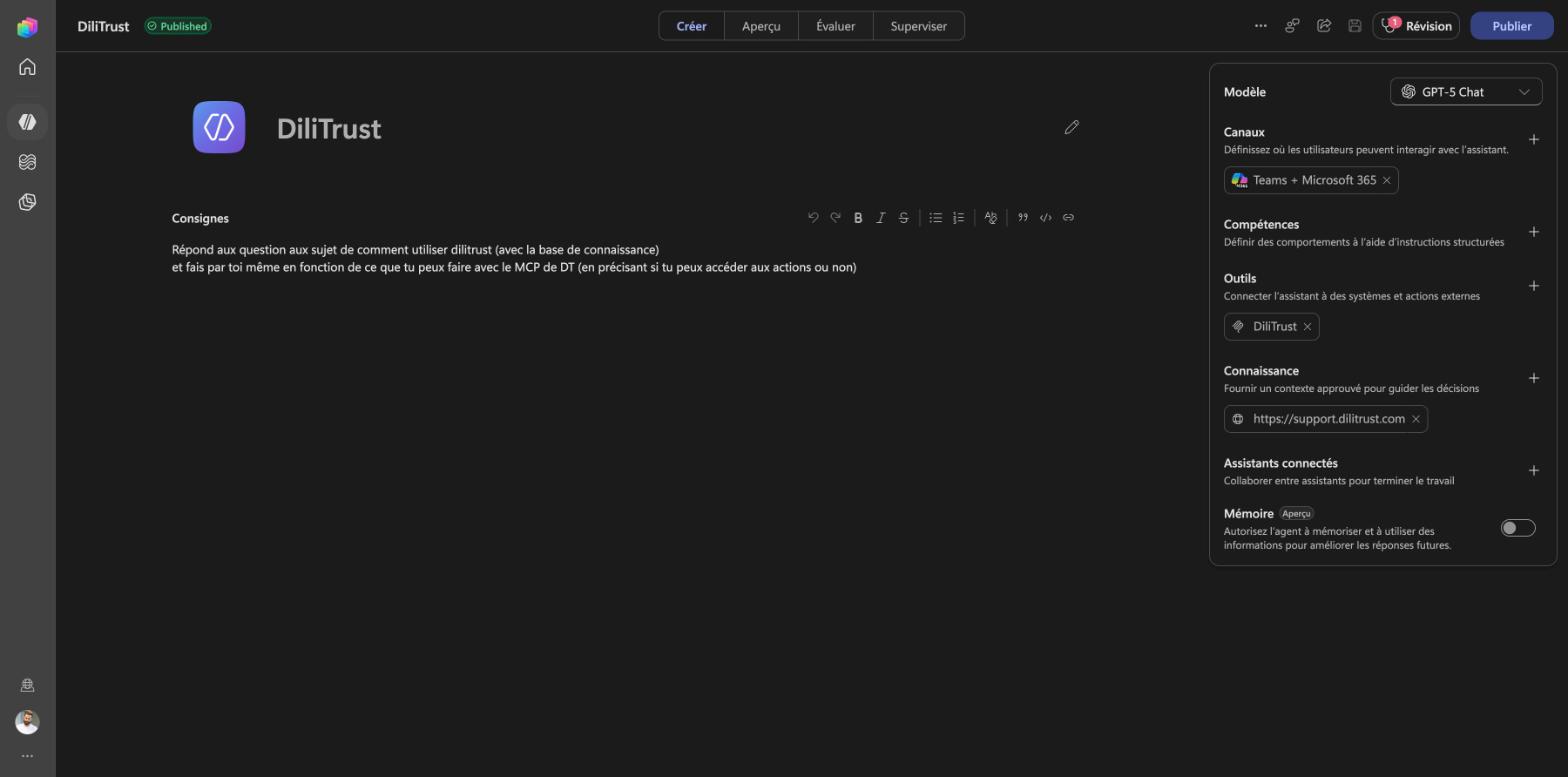
- Customize the agent's icon (recommended). On the agent's page, select the icon next to the agent's name and upload your logo. This is the icon users see in Copilot and Teams, so pick one they will recognize easily.
- In the Channels section of the agent, select + and add Teams + Microsoft 365. Then select the channel to open its settings.
- In Availability, select Microsoft 365 Copilot and Microsoft Teams. This setting cannot be changed after the agent is published.
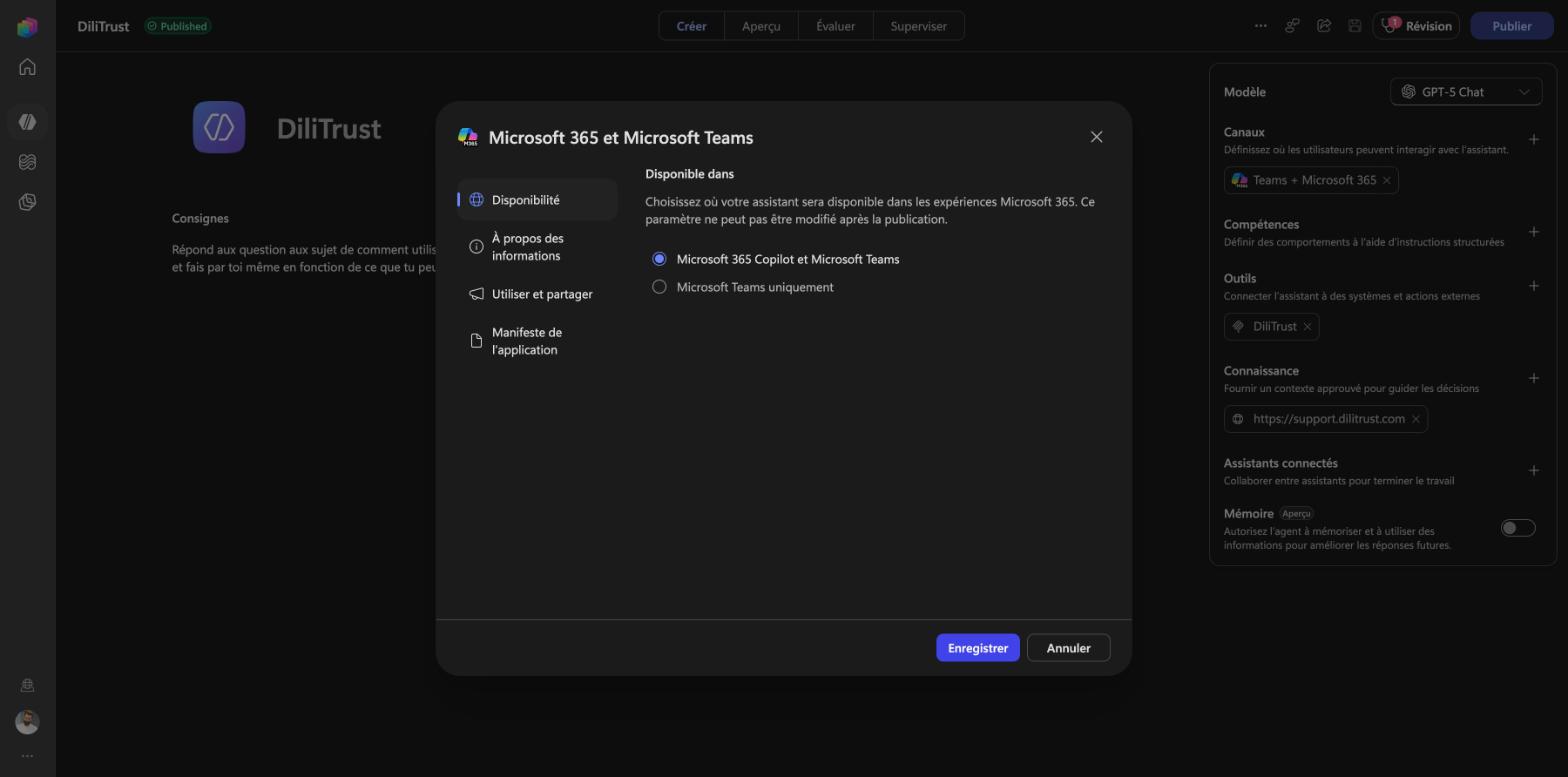
- Optionally, in About, check the name, description, and icon shown to users.
- Select Save, then Publish.
Republish the agent each time you change it (instructions, tools, knowledge, icon). Users only get the changes after you publish again.
Step 6️⃣: Install and use the agent
A published agent does not appear automatically in Copilot or Teams, and it does not show up in the Agent Store search until it is approved in your organization's catalog. To install it:
- In the Teams + Microsoft 365 channel settings, open Use and share.
- Select See in Copilot (or Show in Teams).
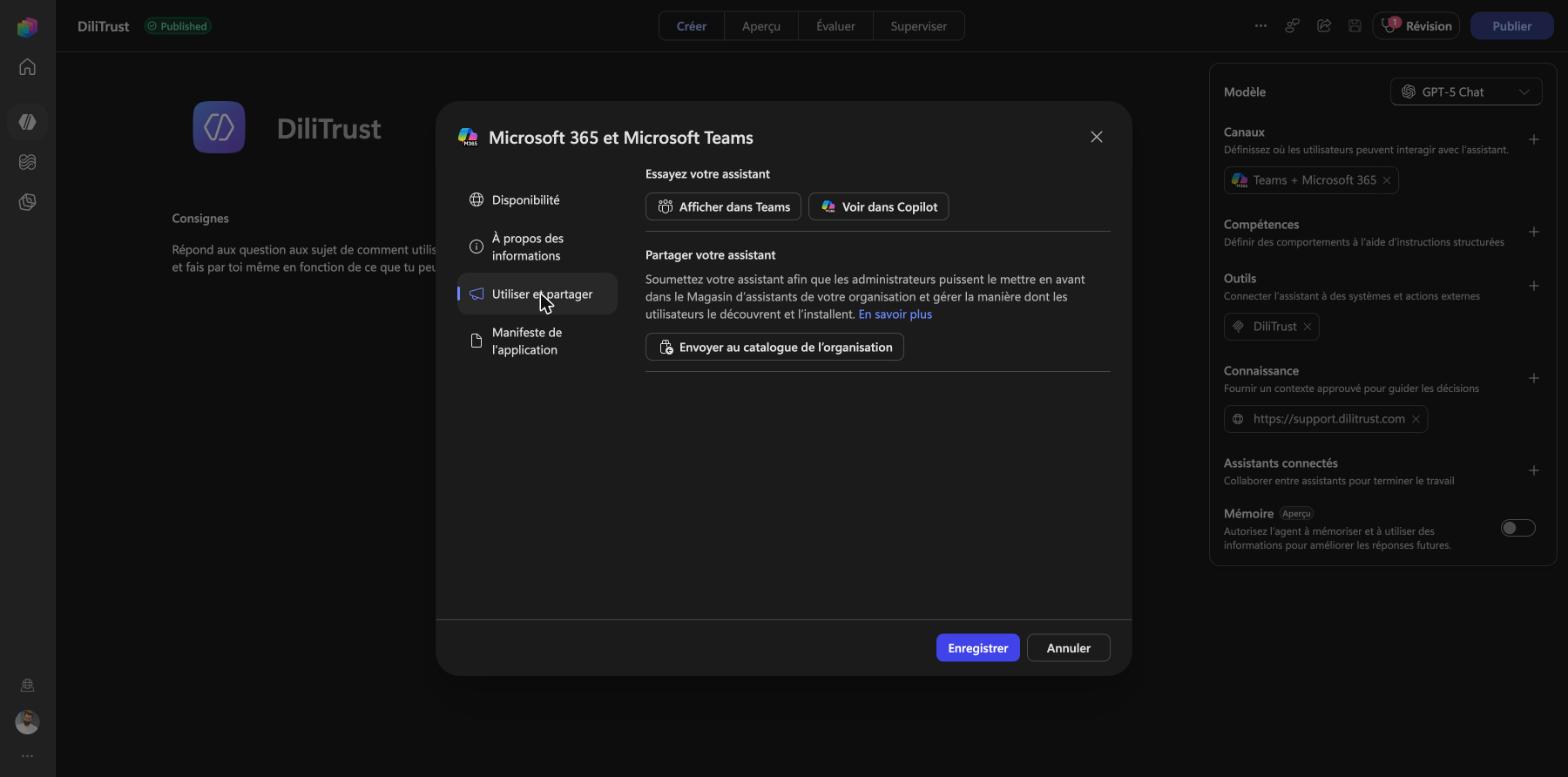
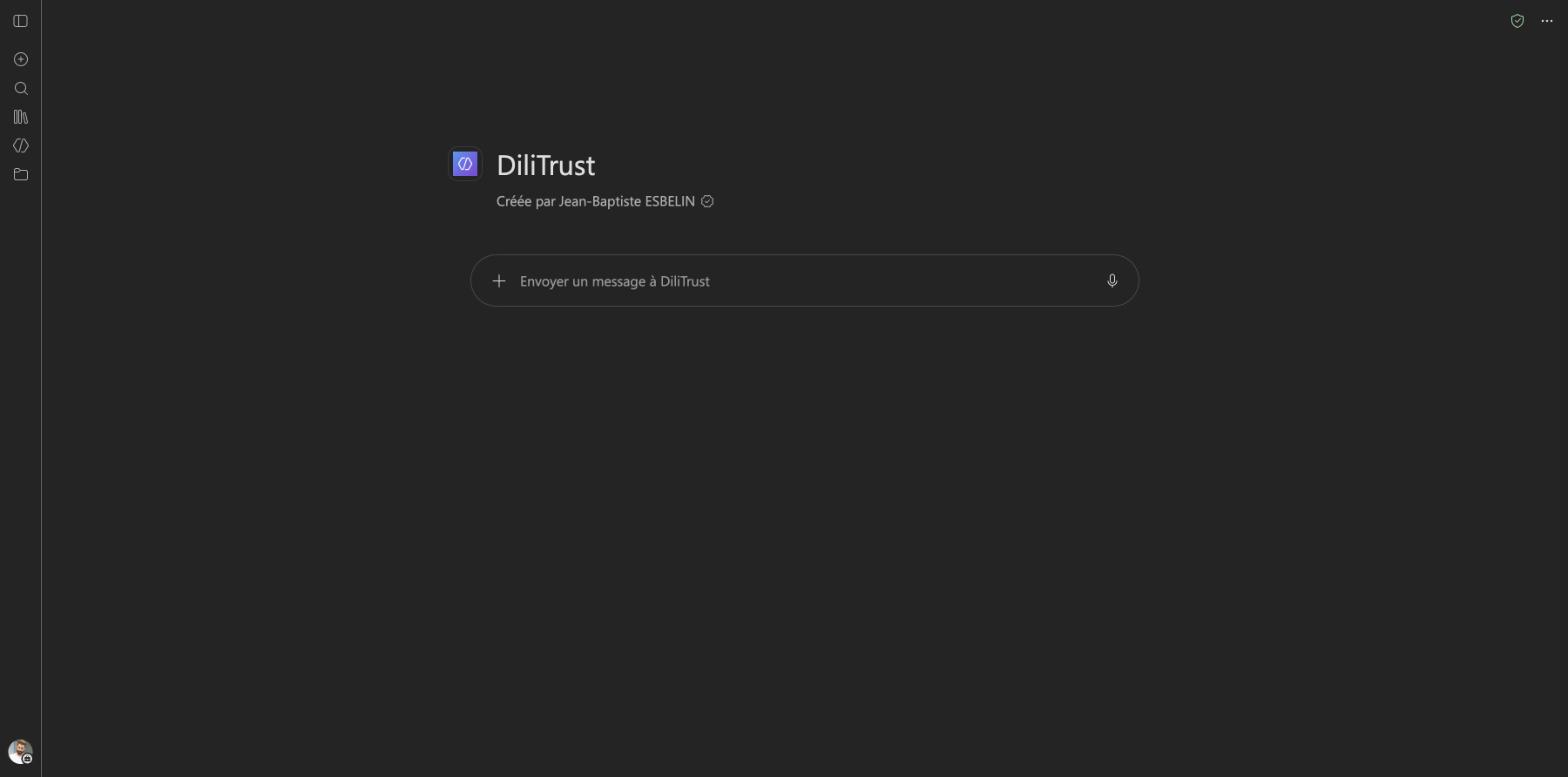
- The agent's page opens. Select Add and accept the requested permissions.
- The agent now appears in Agents in Microsoft 365 Copilot, and in your Chats in Teams. Ask it a question to check that it answers.
Share the agent with your organization
To let other users find the agent in the Agent Store, select Submit to organization catalog in Use and share. A Microsoft 365 administrator must then approve the agent in the Microsoft 365 admin center. Each user then installs it with Add.
✨ Tips & best practices
- Write precise descriptions. The agent decides which source or tool to use based on the server description and the knowledge description. Clear wording gives better answers.
- Separate "explain" and "do" in the instructions. Telling the agent when to answer from the Help Center and when to act with the DiliTrust tools avoids confusion.
- Test before you share. Try a few typical questions and actions in the test chat, then adjust the instructions.
⛔ Limitations & known constraints
- The Help Center knowledge only covers publicly visible articles on support.dilitrust.com. Copilot Studio searches public websites through Bing, so content that requires sign-in is not used.
- Each user signs in with their own DiliTrust account. The agent acts on their behalf through that connection.
- Copilot Studio only supports MCP servers that use the Streamable HTTP transport.
- Each message sent to a Copilot Studio agent uses Copilot Studio credits from the Power Platform environment that hosts it. If the environment runs out of credits, the agent stops answering.
- Publishing an agent does not install it for users. Each user adds it from Copilot or Teams, or finds it in the Agent Store once it is approved in your organization's catalog.
❓ FAQ
Can I use the DiliTrust MCP server with other AI tools?
Yes. See DiliTrust MCP Server: Connect Your AI Tools to DiliTrust.
Why does the agent ask me to sign in?
The DiliTrust MCP server uses OAuth 2.0: each user signs in with their own DiliTrust account so the agent can act on their behalf. Sign in once and accept the requested access.
The agent answers "how to" questions but does not act in DiliTrust. What should I check?
Check that the DiliTrust MCP server appears on the agent's Tools page, that the connection is created, and that your instructions tell the agent to use the DiliTrust tools when asked to perform an action.
The agent does not answer from the Help Center. What should I check?
Check that https://support.dilitrust.com appears on the Knowledge page of your agent and that your instructions tell the agent to use it for "how to" questions.
I published my agent but cannot find it in Copilot or Teams. Why?
Publishing does not install the agent. Check that the Teams + Microsoft 365 channel is added and that the agent is published, then install it from Use and share > See in Copilot > Add (see Step 6). The agent only appears in the Agent Store search after it is approved in your organization's catalog.
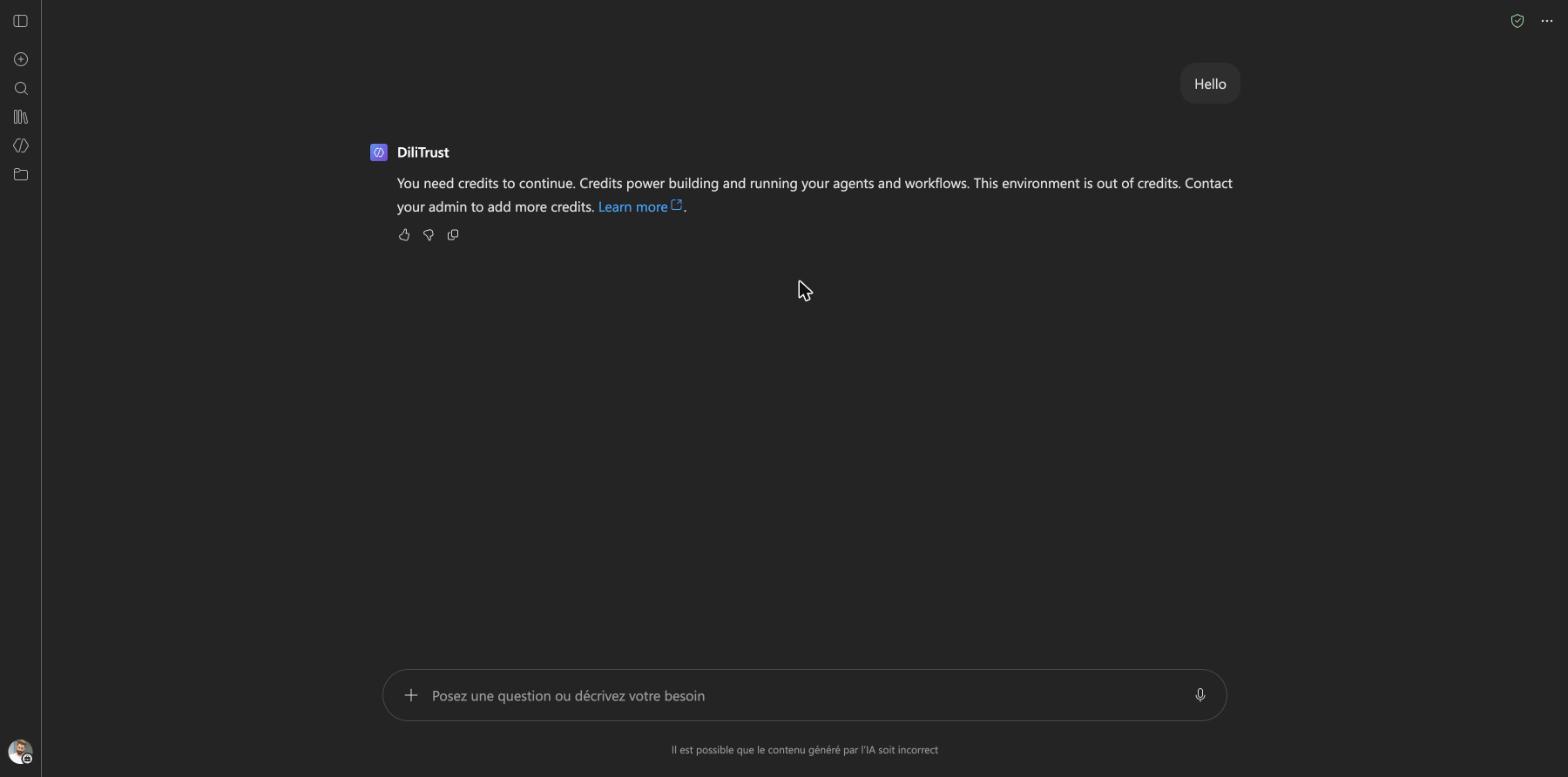
The agent answers "You need credits to continue… This environment is out of credits". What should I do?
The agent is installed correctly, but the Power Platform environment that hosts it has no Copilot Studio credits left. Ask your Power Platform administrator to either:
- allocate Copilot Studio capacity to this environment (Power Platform admin center > Licensing > Copilot Studio), or
- link a pay-as-you-go billing plan to the environment (Power Platform admin center > Billing > Billing plans).
I changed my agent's icon, but users still see the old one. Why?
The new icon is only visible after you publish the agent again. It can take a few minutes to appear; users can reload Teams or Copilot to see it.
? Share this article with your users
Once your agent is published, send your users the following article. It explains how to install and use the DiliTrust agent in Microsoft 365 Copilot and Teams:
? Use the DiliTrust agent in Microsoft 365 Copilot and Teams

Was this article helpful?
That’s Great!
Thank you for your feedback
Sorry! We couldn't be helpful
Thank you for your feedback
Feedback sent
We appreciate your effort and will try to fix the article