Whether you are preparing a group overview, fine-tuning a regulatory document, or sharing a chart with your team, these best practices will help you get the most out of the DiliTrust Orgchart.
⭐ 1. Start in Standard Mode — filter first
Before doing anything else, use Standard Mode to scope your chart: apply entity type filters, field-based criteria, and display options (colours, additional fields) before switching to any other mode.
Think of Standard Mode as your configuration workspace — this is where you decide what goes on the chart and how it looks. Starting with a well-scoped chart makes everything else — saving, sharing, exporting, or editing — much easier.
See also:
✨ 2. Keep each view under 50-60 entities
For the best display performance, it is recommended to keep each chart view to around 50-60 entities. Beyond that, the chart may become harder to read, navigate, and export clearly.
If your group structure is large, split it across multiple views:
- One view for the top holdco and its direct subsidiaries
- One view per sub-group or geographic region
- One view per specific perimeter — a country, a business line, a regulatory scope
Save each scoped view with a clear name so you and your team can retrieve it quickly.
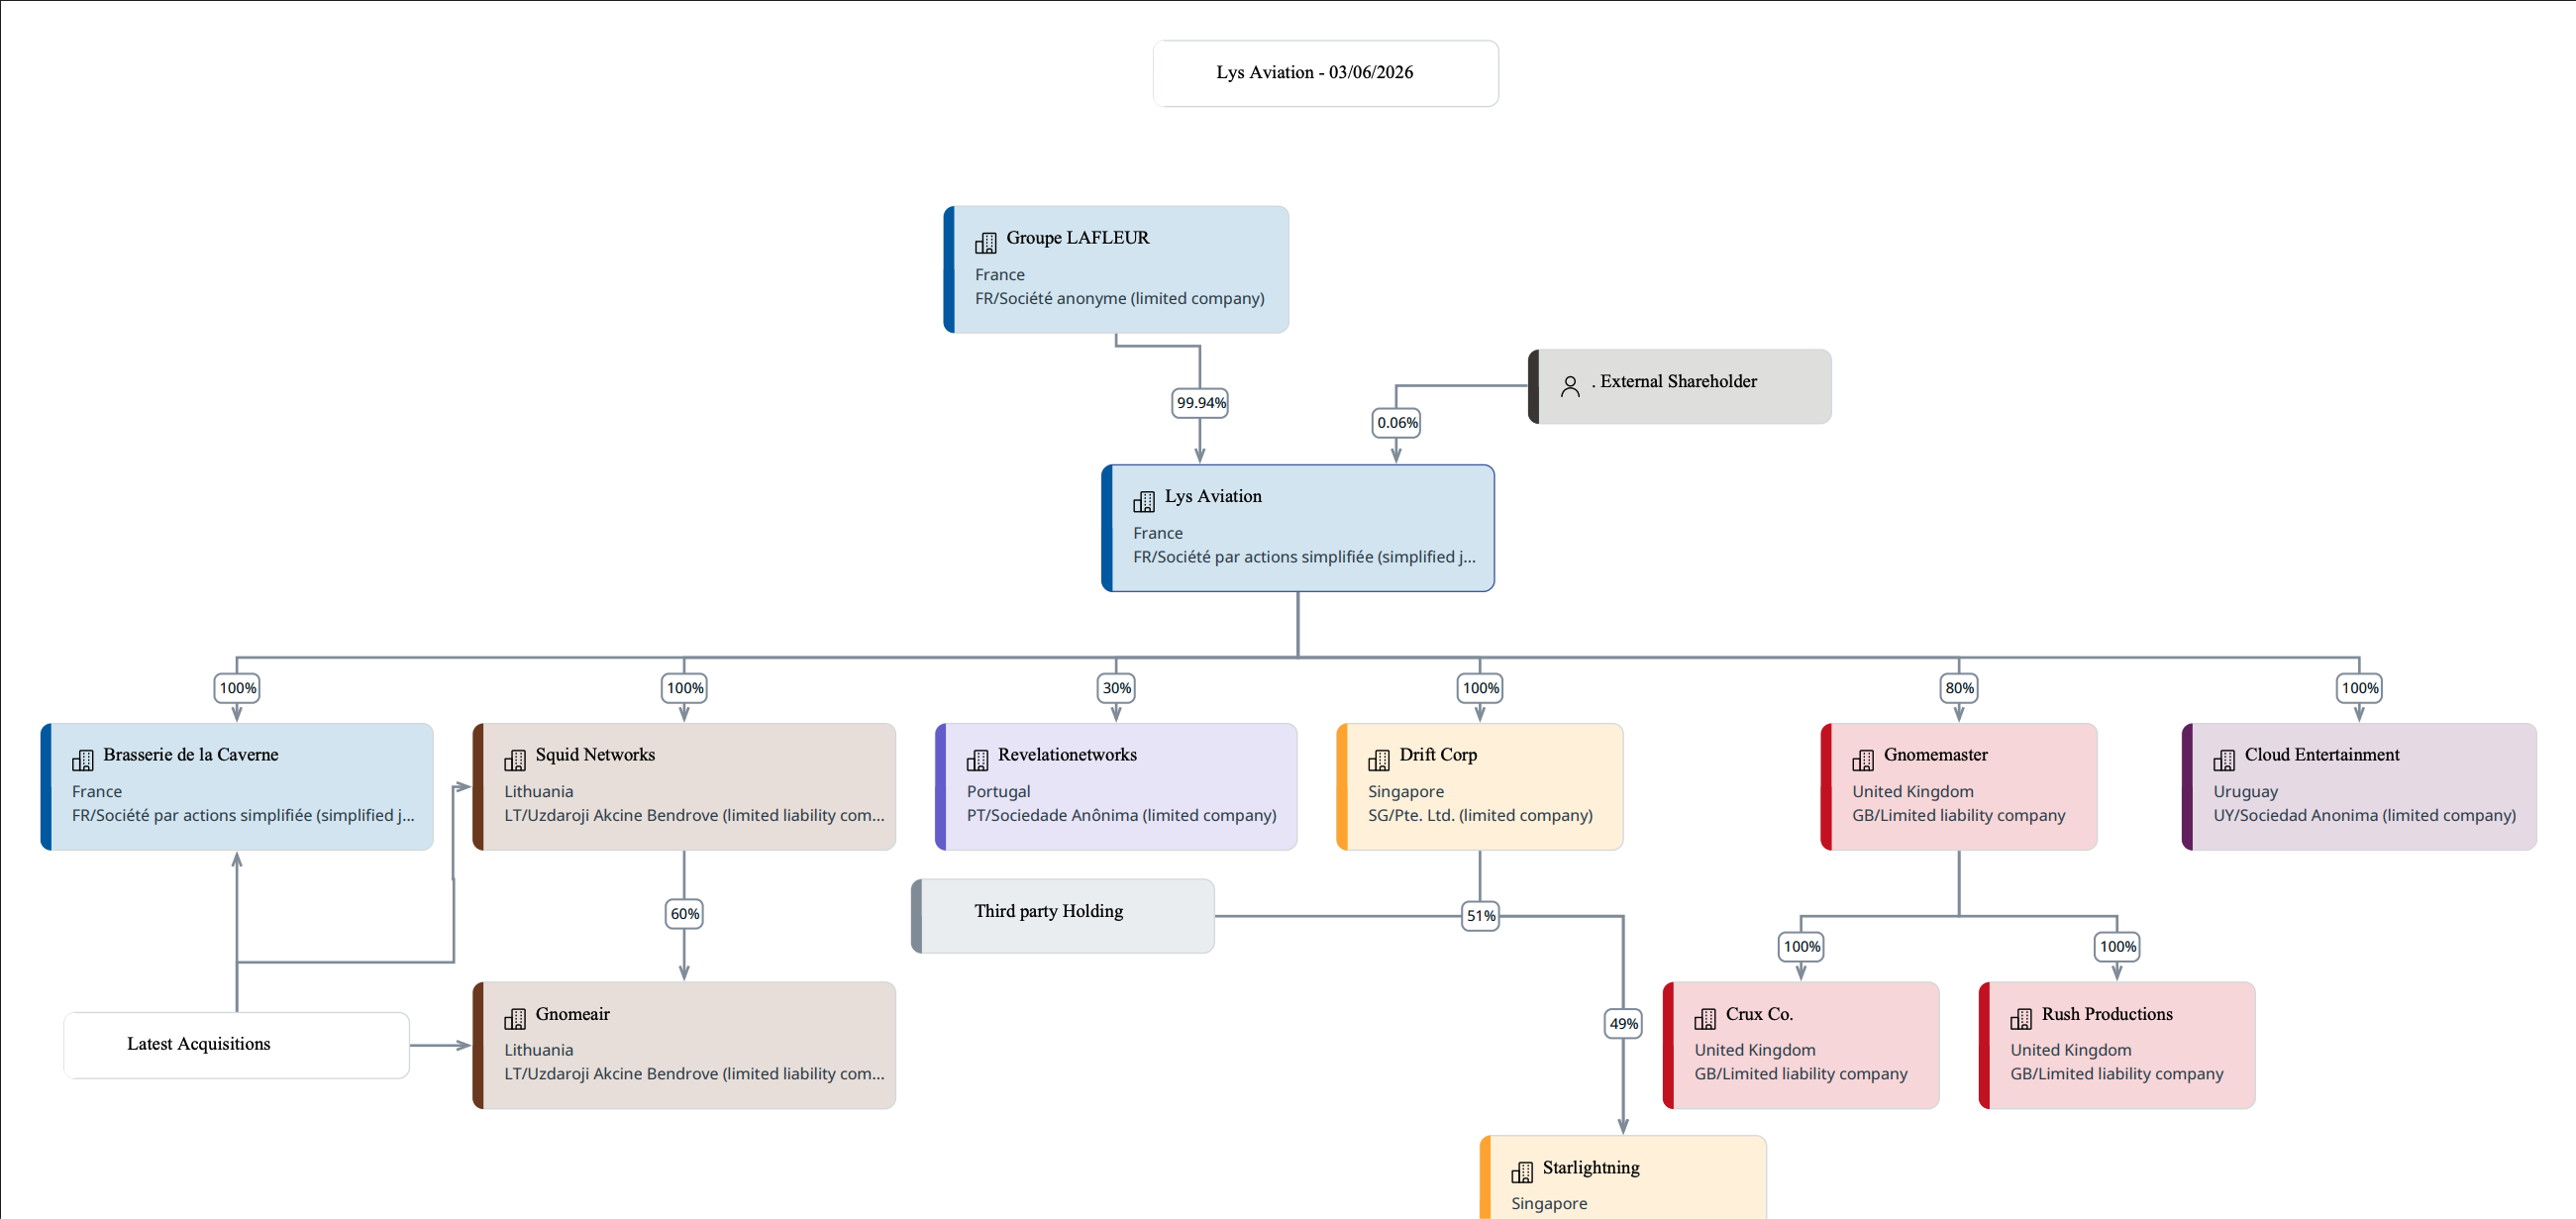
Example of a well-scoped view: keeping the number of entities well under the 50-node limit ensures the chart remains clean, readable, and easy to export.
✅ 3. Use Manual Edit Mode for fine-tuning and simulations
Switch to Manual Edit Mode when the live data alone is not enough — for example when preparing a board document, or simulating a future structure.
⚠️ Important: views saved in Manual Edit Mode are static snapshots. They do not update when your entity data changes. If you need an up-to-date chart after editing in Manual Edit Mode, go back to Standard Mode and regenerate.
See also:
→ Manual Edit Mode — Adjust and simulate your Orgchart without affecting your data
⭐ 4. Save your views — in both modes
A saved view stores your filters, display options, and layout so you can reload it in one click — without reconfiguring everything each time. Make it a habit to save views regularly:
- In Standard Mode — save views for specific perimeters, criteria, or colour configurations you use regularly
- In Manual Edit Mode — save finalised, presentation-ready snapshots for board documents, regulatory submissions, or simulations
Free Edit Mode views are visually tagged in the view selector so you can always distinguish them from Standard Mode views at a glance.
See also:
→ How to save and manage views
✨ 5. Create a public default view for your team
Set up a public default view accessible to all users in your organisation. This view should serve as a shared, at-a-glance reference — already configured with:
- A meaningful scope — the right number and type of entities
- Colour coding applied by entity type or a relevant list field
- The most relevant additional fields displayed on nodes — country, legal form, registration number
Think of it as your team's shared source of truth for the group structure. Keep it updated when major corporate events occur — acquisitions, dissolutions, restructurings.
See also:
→ How to save and manage views
⏩ Quick reference
- 1. Start in Standard Mode: Configuration, Filters, and Design
- 2. Keep each view to around 50-60 entities: split larger groups into multiple views
- 3. Use Manual Edit Mode: for fine-tuning, simulations, and board documents
- 4. Save your views in both modes: to reload your exact configuration in one click
- 5. Create a public default view: to set a shared source of truth for your team
Was this article helpful?
That’s Great!
Thank you for your feedback
Sorry! We couldn't be helpful
Thank you for your feedback
Feedback sent
We appreciate your effort and will try to fix the article